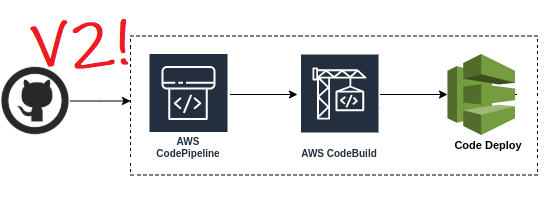
AWS CICD with Github Source Action V2
Published: 2022-10-31In hosting this blog I perform occasional upgrades and maintenance. While investigating an issue where I noticed my build was running twice for each deploy, I saw that I was running the old GitHub OAuth Source Action method. I did not know if this was the cause of the problem, but I had a suspicion, and I also thought it would be good practice to upgrade the CodeBuild Source Action to V2 anyway. Version 2 allows you to do more things with GitHub during your build process which I was interested in.
Below is my short guide and experience.
Version 1
The old GitHub Source Action required that you obtain an OAuth token from GitHub and pass it into CloudFormation when building your deployment stack. There are some issues with this, the most obvious being that you need to keep track of a token. Token-based authentication has caused problems for people in the past mainly because, like a password, it is often in people's default nature to store them somewhere.
There have been some high-profile data breaches recently that have been caused by OAuth tokens being stored in code repositories, the most widely known probably being a leak of Heroku and Travis CI tokens and the most recent being a database access key exposed in a public repository by Toyota.
We all know that we shouldn't do it, but sometimes it is overlooked. GitHub did in fact make it harder to store OAuth tokens in your repo accidentally by automatically scanning your repositories for OAuth tokens that it has generated, and will automatically remove any that it finds. That's some fancy shift-left DevSecOps right there. But this is only a select case and most tokens stored in GitHub will be stored unnoticed.
Version 1 also requires a separate webhook in order to detect changes in the repository. This was extra configuration in your cloudformation and required some additional steps to exchange URL endpoints and parameters. It worked but it was fairly hands-on.
Version 2
The new GitHub Source Action comes as a single entity, being an AWS CodeStar Connection item. This installs an OAuth Application into your GitHub account which allows AWS to access repositories that you define in ways that you specifically allow. The webhook functionality is also built-in so that you do not need to define the behaviour separately in your stack. But possibly the most useful improvement is that you can clone a repo as opposed to downloading and extracting a ZIP file. This opens a world of possibilities, because it allows you to run git commands as part of your build step.
That's really it in a nutshell - some big advantages over V1 with not really much difference in setup.
My Old CloudFormation
Warning - this post deals with CloudFormation! No fancy SAM stuff here...
This is what my old stack definition looked like (irrelevant items are hidden):
# CodePipeline
  WebsiteDeploymentPipeline:
    Type: AWS::CodePipeline::Pipeline
    Properties:
      Name: MyStack
      Stages:
        -
          Name: Source
          Actions:
            -
              Name: GithubSourceAction
              ActionTypeId:
                Category: Source
                Owner: ThirdParty
                Provider: GitHub
                Version: '1'
              OutputArtifacts:
                - Name: WebsiteSource
              Configuration:
                Owner: MyName
                Repo: myrepo
                Branch: master
                PollForSourceChanges: false
                OAuthToken:
                  Ref: GitHubOAuthAccessToken
              RunOrder: 1

# Webhook
  WebsiteDeploymentWebhook:
    Type: AWS::CodePipeline::Webhook
    Properties:
      Name: MyWebhook
      Authentication: GITHUB_HMAC
      Filters:
        -
          JsonPath: "$.ref"
          MatchEquals: refs/heads/{Branch}
      AuthenticationConfiguration:
        SecretToken:
          Ref: GitHubOAuthAccessToken
      TargetPipeline:
        Ref: WebsiteDeploymentPipeline
      TargetPipelineVersion: 1
      TargetAction: GithubSourceAction
So my first stage defined a 'Source' action to retrieve the source from GitHub. I also had a Webhook action which handled the Webhook from GitHub and kicked off my pipeline. After creating the webhook, you then needed to run aws list-webhooks to get the URL endpoint, which you then needed to go and configure in GitHub.
So there were two sets of setup-steps:
- Ask GitHub for an OAuth Token, then work out how to safely inject this into your cloudformation (probably using parameters)
- Ask AWS the URL of the webhook it created from your CloudFormation request, then use this to configure the GitHub webhook call
The New CloudFormation

This is the new CloudFormation after the switch:
# CodePipeline
WebsiteDeploymentPipeline:
    Type: AWS::CodePipeline::Pipeline
    Properties:
      Name: MyStack
      Stages:
        -
          Name: Source
          Actions:
            -
              Name: GithubSourceAction
              ActionTypeId:
                Category: Source
                Owner: AWS
                Provider: CodeStarSourceConnection
                Version: '1'
              OutputArtifacts:
                - Name: WebsiteSource
              Configuration:
                ConnectionArn: !Ref WebsiteCodeStarConnection
                FullRepositoryId: 'MyName/myrepo'
                BranchName: master
              RunOrder: 1

# GitHub Connection
  WebsiteCodeStarConnection:
    Type: AWS::CodeStarConnections::Connection
    Properties:
      ConnectionName: MyNewGitHubConnection
      ProviderType: GitHub
What? Is that all the code you need to set up the connection? A name and a provider? Yup. Easy.
But wait, it's not that easy!
One thing that we do need to do using GitHub V2 is allow our CloudFormation role to access CodeStar. This is not a big deal but is easily overlooked:
  WebsiteDeploymentRole:
    Type: AWS::IAM::Role
    Properties:
      Description: Role to allow deployment of website data from Source Control to S3
      # Some other permissions you probably have here...

      Policies:
        - PolicyName: CodeStarConnectionAccess
          PolicyDocument:
            Version: 2012-10-17
            Statement:
              - Effect: Allow   # Allow use of codestar
                Resource:
                  - !Sub 'arn:aws:codestar-connections:${AWS::Region}:${AWS::AccountId}:connection/*'
                Action:
                  - 'codestar-connections:*'
You may see some wrist-slapping lines above. Yes I know that I am allowing access to all actions on all connections by using the *, but this is just for brevity in the example. Please make sure you lock down your access according to the requirements of your case.
I did however want to highlight the use of the built-in parameters AWS::Region and AWS::AccountId so that you don't have to hard-code them throughout. Using these can also free you to re-use these definitions and deploy them elsewhere.
We also need to grant the role used to run the pipeline permission to access CodeStar. You should already have a role which deploys artefacts and performs logging, so this is just a case of extending the permissions of that role:
  CodeBuildServiceRole:
    Type: AWS::IAM::Role
    Properties:
      RoleName: Tech-Web-CodeBuild-Service-Role
      Policies:
        # Other policies that you may have...

        - PolicyName: CodeStarConnection
          PolicyDocument:
            Version: '2012-10-17'
            Statement:
              - Action:
                - 'codestar-connections:UseConnection'
                Effect: Allow
                Resource: !ImportValue 'ConnectionARNExportedFromOtherFile'
Note that in my CloudFormation I have most of my IAM definitions and policies in a different CloudFormation, so if you also do this you will need to export the CodeStar ARN and import it like I do here. If you have everything in one CloudFormation file then you won't need to do this.
That's still not all folks
Because this deals with authentication, there needs to be some manual step from a human. In the old version, we needed to manually generate an OAuth Token and pass it to our stack (and also mess about with webhook URLs). This time we need to set up the connection manually. Defining the connection in the CloudFormation will only provide you with an entity through which your pipeline can talk to GitHub. We still need to manually give it the thumbs-up. Because of this, when the connection is shown it is marked to be 'PENDING'.
This can be done one of two ways. First, you can edit your CodePipeline, then edit the CodePipeline Source Stage, then edit it again (yeah, a bit long-winded), at which point you will see this dialog:
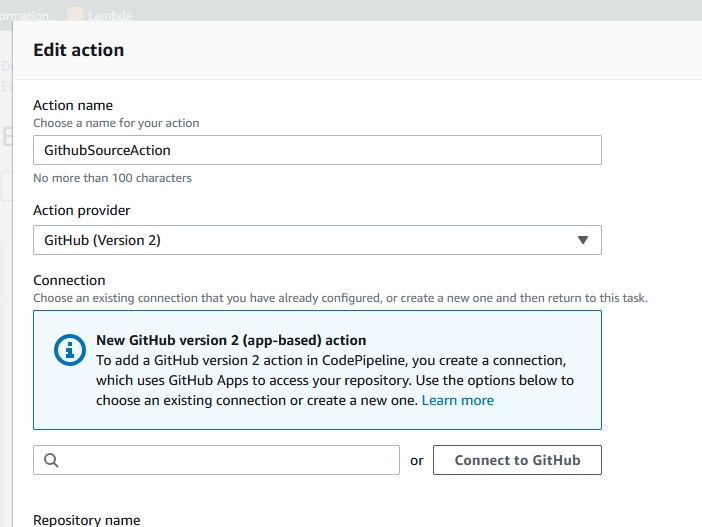
Alternatively, you can navigate to the CodeSuite settings (which you can also find under 'settings' in the left-had navigation panel when you are viewing your pipeline), which will list your connections. In the connection list you will be shown an 'Update pending connection' button which you use to complete the connection.
In either of these methods (the second being a bit more user-friendly), you will be asked to authenticate with GitHub, and on doing so a 3rd-Party app will be installed in GitHub.
Then you are all set!
So What Now?
The big advantage for me is that I now have access to the git command-line. One of the features of this blog is that it can refer to git creation and check-in timestamps to show on articles and to order them. After upgrading to V2 I was able to use this functionality and no longer have to add dates in meta-sections.
You may find a similar benefit - as an example here is a small bash command that will list check-in dates for all your .md markdown files:
for f in `find . -type f -name "*.md"`;
  do git log --format=%ci --diff-filter=A $f | cut -d ' ' -f 1 | xargs echo $f
done
You can of course to some much more funky stuff to display who the author was automatically, and other things beyond the scope of this article.
So, if you haven't already, I recommend switching to V2-type connections. I hope this post is useful to you for doing so.